You don't need years of backyard experience or a competition-grade setup. You need the right information, a little patience, and the willingness to let the fire do its job.
There's something about a grill that makes people nervous. The heat. The timing. The fear of serving chicken that's pink in the middle or a steak that could double as a hockey puck. It's the kind of cooking that feels performative — done outdoors, in front of people, with no way to quietly fix your mistakes before anyone notices.
But here's the thing every seasoned pitmaster won't tell you outright: grilling is actually one of the more forgiving methods of cooking once you understand its basic logic. The mistakes beginners make are almost always the same mistakes, and almost all of them are avoidable.
This beginner's guide to grilling walks you through everything — choosing your first grill, lighting it properly, managing heat, knowing when your food is done, and a handful of techniques that will quietly make you look like you've been doing this for years. No tricks. No hype. Just what actually works.
1. Choosing Your First Grill
Before you light anything, you need to pick the right tool. For beginners, the choice comes down to three main types: charcoal, gas, and electric. Each has a genuine use case, and none of them is objectively superior — they're just different.
Charcoal Grills
Charcoal grills are the old-school choice, and they earn their reputation. They burn hotter than gas, produce better char marks, and give food that distinctive smoky flavor that no gas burner truly replicates. The tradeoff is time: you're looking at 20–30 minutes to get your coals ready, and temperature control requires actual technique.
For beginners who care about flavor and enjoy the ritual, charcoal is a deeply satisfying place to start. The Weber Kettle, a simple 22-inch round grill, remains one of the best-selling grills in the world for good reason — it's versatile, forgiving, and built to last decades.
Gas Grills
Gas grills offer convenience that's hard to argue with. Turn a knob, push an ignition button, and you're grilling in under 10 minutes. Temperature control is precise and instant. If you're the type who grills on weeknights after work, gas fits that lifestyle far better than charcoal does.
The downside is flavor — or rather, the relative absence of the smoky character that charcoal produces naturally. You can partially compensate with wood chips or a smoker box, but it's not the same. Gas grills also tend to cost more upfront, though they're cheaper to fuel over time in most regions.
Electric Grills
Electric grills exist primarily for situations where open flame isn't an option — apartment balconies, indoor use, fire-restricted areas. They're the most consistent in terms of temperature and the easiest to clean. They're also the least exciting from a culinary standpoint, producing food that's more "pan-seared on a ridged surface" than genuinely grilled. Still, they beat not grilling at all.
Grill Type Comparison Table
| Feature | Charcoal | Gas | Electric |
|---|---|---|---|
| Preheat time | 20–30 min | 8–12 min | 5–10 min |
| Flavor quality | Excellent — smoky char ✓ Best | Good — mild smokiness | Moderate — no smoke |
| Temperature control | Manual — learning curve | Precise and instant ✓ Best | Very precise |
| Startup cost | Low ($40–$200) ✓ Best | Medium ($200–$600+) | Low–medium ($50–$250) |
| Running cost | Low (charcoal/chimney) | Low (propane/natural gas) ✓ Best | Varies (electricity) |
| Portability | High — no fuel line ✓ Best | Medium — tank required | Outlet-dependent |
| Indoor/balcony use | No | Outdoor only | Yes ✓ Best |
| Best for | Flavor-focused cooks | Weeknight convenience | Restricted spaces |
| Skill ceiling | High — rewarding | Medium | Low |
2. Lighting the Grill: Getting Fire Right
Nothing derails a grilling session faster than a bad start. Improperly lit charcoal or a gas line issue creates frustration before the food ever touches the grate.
The Chimney Starter Method (Charcoal)
If you're grilling on charcoal, buy a chimney starter. It's a $15–$25 investment that makes lighter fluid completely unnecessary and produces more evenly lit coals every single time. The process is simple: crumple two sheets of newspaper, place them under the chimney's lower chamber, fill the top with charcoal briquettes or lump charcoal, and light the paper. In 15–20 minutes, your coals will be glowing orange with a light grey ash coating. That's when they're ready.
Lighter fluid does work, but it often leaves a petrochemical taste on food if you don't wait long enough for it to burn off completely. The chimney method produces cleaner, more consistent heat without the chemical risk.
Lighting a Gas Grill
Open the lid before turning on the gas — this prevents gas from pooling and igniting all at once. Turn on the burners, press the ignition, and close the lid. Let it preheat on high for 10–12 minutes before lowering to your target temperature. Always check your propane level before you start cooking. Running out mid-session with guests waiting is the grilling equivalent of a flat tire on the highway.
The most common beginner mistake isn't technique — it's impatience. They don't let the grill get hot enough before they start cooking.
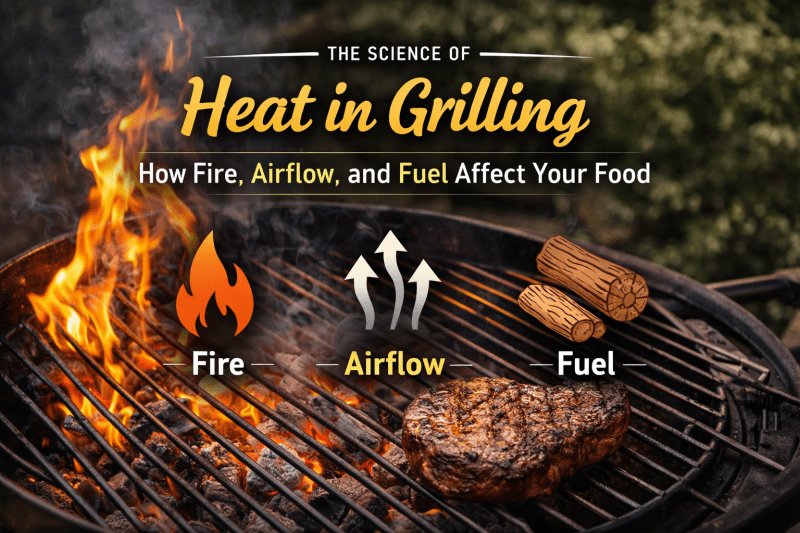
3. Understanding Heat Zones
One of the most useful concepts in grilling — and one that most beginners never learn until years in — is the two-zone fire. Instead of spreading coals evenly or running all burners at the same setting, you create a hot zone and a cooler zone. This gives you direct and indirect heat at the same time.
On a charcoal grill, this means banking all your lit coals to one side. On a gas grill, it means running one or two burners on high and leaving the others off or on low. The result is a grill with two distinct cooking environments on the same surface.
Why Two Zones Matter
The hot zone is where you sear. A hard sear over direct high heat is what creates the caramelized crust that makes grilled meat taste like grilled meat. The cooler zone is where you finish cooking without burning the exterior — it's essentially a convection oven on your grill.
Thick cuts of meat almost always benefit from this approach: sear over direct heat for a few minutes per side to develop color, then move to the cool side to bring the interior to temperature without charring the outside.
The three zones to understand: the searing zone (direct high heat, 450–550°F) for steaks, burgers, chops, and anything that needs hard char and color; the finishing zone (indirect medium heat, 300–375°F) for thick cuts, bone-in chicken, and fish that needs gentle even cooking; and the holding zone (indirect low heat, 225–275°F) to keep finished items warm while other pieces finish cooking.
4. Temperature Is Everything
Buy a meat thermometer. This is the single most important piece of advice in this entire guide, and the one most beginners ignore because pressing down on a steak and declaring it "done by feel" seems more satisfying. It isn't. A $15 instant-read thermometer removes all guesswork and essentially makes it impossible to serve unsafe or overcooked food.
The hand test — where you press the meat and compare it to the softness of various parts of your palm — is a useful skill eventually, but it takes real repetition to develop. Until then, the thermometer is your best friend.
Target Temperatures for Beef
Rare comes in at 125°F with a cool red center. Medium rare sits at 135°F with a warm red center. Medium reaches 145°F with a pink center. Well done is 160°F and above, with little or no pink remaining.
For food safety: poultry must reach 165°F internally at all times — no exceptions, no preferences. Pork is safe at 145°F, followed by a three-minute rest. Ground beef should always reach 160°F. These aren't suggestions.
Also remember: meat continues cooking after it leaves the grill. A steak pulled at 130°F will carry over to around 135–138°F during its rest. Always account for this carryover and pull your meat 5°F below your target temperature.
5. The Art of the Rest
After all the effort of building a fire, managing zones, and nailing your temperatures, the most common final mistake is the worst one: cutting into the meat immediately. Don't do it.
When meat is exposed to high heat, its moisture migrates toward the center. Cutting immediately releases all of that juice in a single dramatic pour onto your cutting board. Let the meat rest on a warm plate or rack — loosely tented with foil if you like — and those juices redistribute through the whole cut. The result is a dramatically juicier piece of meat with no additional effort.
A thin steak needs three to four minutes. A thick ribeye needs five to seven. A whole chicken needs at least fifteen. A brisket or large roast can rest for thirty minutes or more. The waiting is part of the cooking.
6. What to Grill First: Beginner-Friendly Proteins
Not everything is equally forgiving on a grill. Some cuts and proteins are genuinely good starting points; others will punish even small mistakes.
Start Here
Burgers are probably the single best training ground for beginner grillers. They're forgiving with temperature, fast-cooking, and the results are obvious. Use an 80/20 fat ratio — the fat keeps them juicy over direct heat — and don't press them down with a spatula. That squeezes out all the moisture you're trying to keep.
Bone-in chicken thighs are more forgiving than breasts because the fat content is higher and the bone provides a buffer against overcooking. Season generously, start on direct heat to crisp the skin, then move to indirect to bring the interior up to temperature without burning.
Sausages and hot dogs are essentially foolproof. Medium heat, turn frequently, and you're done in eight to twelve minutes. They teach you grill rotation without the stakes of a more expensive cut.
Intermediate Territory
Ribeye and strip steaks are absolutely achievable for beginners, but they require proper preheat, a two-zone setup, and a thermometer. The cost of a mistake is also higher, so treat them as a reward for mastering burgers and chicken first.
Salmon and thick fish fillets are tricky primarily because they stick and fall apart easily. A well-oiled grate, high heat, and minimal flipping solves most of this. Fish is done when it flakes with gentle pressure — 145°F is the USDA target.
7. Seasoning, Marinades, and Rubs
Grilling rewards simplicity in seasoning. The Maillard reaction — the chemical process responsible for browning and crust formation — does extraordinary flavor-building work on its own. Salt, pepper, and a clean grate will outperform a complicated marinade on most cuts.
Dry Rubs
A dry rub is a mixture of salt, pepper, and whatever spices fit your flavor profile — smoked paprika, garlic powder, cumin, cayenne, brown sugar. Apply it at least 30 minutes before cooking, or ideally the night before. The salt draws moisture to the surface, which then gets reabsorbed into the meat along with the spice flavors. The result is deeper seasoning throughout, not just on the surface.
Marinades
Marinades work best on tougher cuts — skirt steak, flank steak, chicken thighs, pork shoulder — where acids (citrus, vinegar, yogurt) help break down muscle fibers and improve texture. On premium, tender cuts, marinades don't penetrate deeply enough to change much. A good acid-based marinade needs at least two hours to work; overnight is better. Avoid marinating for more than 24 hours with high-acid mixtures — the texture becomes mushy rather than tender.
Never use marinade that has touched raw meat as a basting sauce unless you boil it first for at least five minutes. Cross-contamination with raw poultry or pork is a serious food safety risk.
Salt Timing Matters
Salt either immediately before grilling (right as the grill is heating up) or at least 45 minutes in advance. Salting in the 5–40 minute window draws moisture to the surface without giving it enough time to be reabsorbed — the result is a wet surface that steams instead of sears. Timing this correctly makes a noticeable difference in crust quality.
8. Cleaning and Maintaining Your Grill
A clean grill grate does two things: it prevents food from sticking, and it stops old residue from adding off-flavors to your food. The best time to clean your grates is immediately after cooking, while they're still hot. A wire brush (or a ball of crumpled aluminum foil held with tongs) removes buildup in seconds when the grate is hot. Trying to scrub cold, weeks-old grease off a grate is a different — and much worse — experience.
After brushing, wipe the grate with a lightly oiled paper towel using tongs. This seasons the surface and reduces sticking on your next session. For a charcoal grill, empty the ash catcher regularly — ash accumulation restricts airflow and compromises temperature control. For gas grills, clean the burner covers and grease tray every few sessions to prevent flare-up buildup.
Beyond session-to-session care, do a deep clean at the start and end of each grilling season: remove the grates, wash with soap and water, inspect burners or fire grates for rust or blockages, and re-oil everything before storage. A well-maintained grill lasts a very long time.
9. Common Beginner Mistakes — and How to Avoid Them
Lifting the lid constantly is one of the most frequent habits to break. Every lift drops grill temp by 25–50°F and extends cooking time. Trust the process and check only when necessary.
Putting cold protein on the grill is another common error. Take meat out of the refrigerator 20–30 minutes before grilling. Cold centers cook unevenly — the surface burns before the interior has time to reach temperature.
Not oiling the grate leads to tearing and sticking. Wipe grates with a lightly oiled cloth just before cooking. Cold oil burns; grate oil prevents sticking without causing flare-ups.
Overcrowding the grill is tempting when you're feeding a crowd, but packing food tightly traps steam, lowers grate temperature, and prevents proper searing. Leave space between pieces.
Skipping the rest is probably the most costly mistake in terms of result quality. Cutting immediately after grilling loses most of the meat's accumulated juices. Rest even thin cuts for a few minutes minimum.
Panicking during flare-ups causes people to reach for the water bottle. Don't. Move food to the cool zone instead — water causes ash clouds and temperature drops. Let the flare die down naturally, then continue.
10. Building Your Grilling Instincts Over Time
The most important thing about this beginner's guide to grilling is understanding that it gives you a foundation, not a ceiling. Every grill behaves slightly differently. Charcoal brands burn at different rates. Weather — especially wind and ambient temperature — affects heat management significantly. Altitude changes cooking times. Your specific grill's hot spots and cool patches are unique to your setup.
The only way to learn all of this is to grill. Regularly. With attention. Take notes if you're serious about improving — what cut, what temperature, how long, what result. After a dozen sessions, you'll notice patterns that no guide can teach you because they're specific to your equipment and environment.
Start with forgiving proteins. Master your temperature management. Buy a thermometer. Rest your meat. Clean your grate. These five habits will take you from a nervous first-timer to a confident weekend cook faster than any other combination of advice.
Grilling is one of the oldest forms of cooking in human history. The fundamentals haven't changed. What changes is how well you understand and work with the fire.
The grill is one of the few places in cooking where the process is as satisfying as the result. There's something genuinely rewarding about managing a live fire, reading the heat, and producing something that tastes like it came from somewhere worth going. This beginner's guide to grilling is your starting point — the fire, from here, is yours to tend.